Saturday, October 30, 2010

Lots learned at Saxon Holt Photography Workshop

For the past few years the majority of photographs I've taken have been close-ups of plants and while I've enjoyed examining the structure and uniqueness of those plants I've really been wanting to "open up" and become better at photographing the whole garden and capturing a sense of space. I've also really wanted to practice a bit more with photographing light. I usually just wait for a foggy day so I don't have to deal with those pesky harsh shadows but I was beginning to feel that technique left the photos a bit flat and lifeless. I wanted to see if I could bring sunshine into my photographs.

When I heard that Saxon Holt was giving a series of photography workshops at San Francisco Botanic Garden I thought it was too good to be true. I could actually learn from the master of garden photography himself! Sign me up!

It was a fantastic series and I learned so much more than I could have imagined. It was wonderful to hear him talk about his own photographs and see how he captured the drama, dealt with problems, framed scenes and post-edited.

Here are a few of the things I learned:

1. Slow Down. This is something I will always struggle with. I want to start photographing everything as soon as I can. But really it is best to try walking around the garden and looking at all the different angles first. Once you've got a feel for the garden then set up the shots you want.

2. Use a tripod. Period.

3. Also try many different angles to the photograph. It is possible a foot (or inch) or so to the left or right, up or down might make a huge difference. I was frequently surprised at which angle looked the best once I got the photos off the camera.

4. Fill the frame. Look for dead spots in the composition. Negative space is OK but too much of it leaves the image lacking in drama and interest.

5. Anchor the corners of the frame to keep the eye from wandering out and to give the image a sense of grounding. Bits of foliage can accomplish this quite well.

6. Identify your focal point and make sure other elements in the photograph support it. Do things in the photograph distract your eye and draw it away from the subject? For example, things with brighter light on them than the subject will often be what the viewer looks at.

7. The "60 Minutes" theory. Saxon explained the technique of the tv show "60 Minutes" and how they always frame the shot of the person so that the top of the head is out of the frame to create a more intimate feeling. The same applies to garden photography. For example, if photographing trees, leaving the tops out of the frame can make them seem closer and more part of the viewer's world, as if they viewer is in the photograph too, not just an outside observer.

8. Don't let paths wander out of the frame without a suggested destination. This can be accomplished by showing a bit of trees, light, negative space that represents the rest of the garden the path is headed towards. (This is a personal preference and a rule that can certainly be broken in some circumstances.)

9. Plants in the foreground, even if they are out of focus, can be a good thing. They often act as framing anchors and make the viewer feel to be in the photo rather than an outside observer.

10. The warming tool is definitely your friend when photographing gardens. The space can often come off as cold on film and warming up the photo can make the space seem much more inviting.

11. Have the confidence to crop aggressively. This is similar to the "60 Minutes" theory. Sometimes you realize you've got too much dead space once the image is on your computer. Use that crop tool. You can always go back if you don't like it.

It takes a lot of practice to develop a good sense of balance and weight in a photograph. And a lot of it is personal preference - how you like to see shapes arranged within a frame. (I recommend taking tons of photographs and eventually you'll develop your own feel for it.) I like to think I started the workshops with a pretty good personal sense of composition. But Saxon opened my eyes to new ways of composing and arranging space. If you enjoy photographing and would like to glean some of Saxon's vast knowledge I HIGHLY recommend the next set of workshops that will be happening in spring. Saxon is a wonderful instructor, super supportive and very forthcoming with his expertise. There are a gazillion more things I learned from him but this is a blog post, not a novel, so I must be brief!

Here are a few of my favorite photos I took during the workshops:

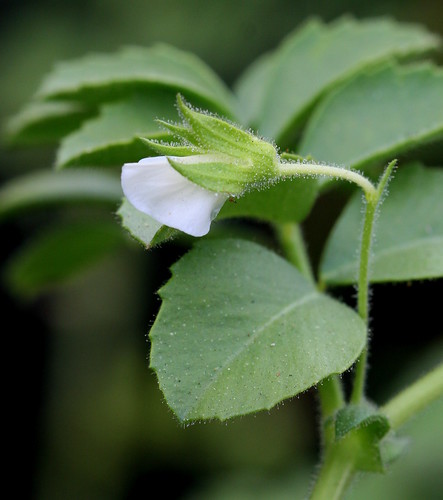
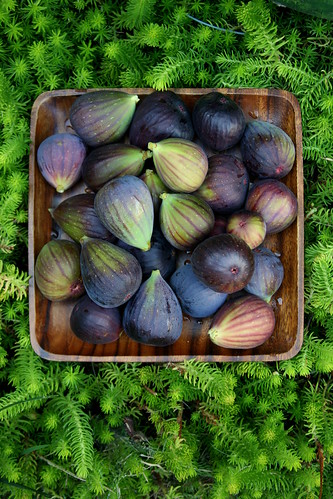
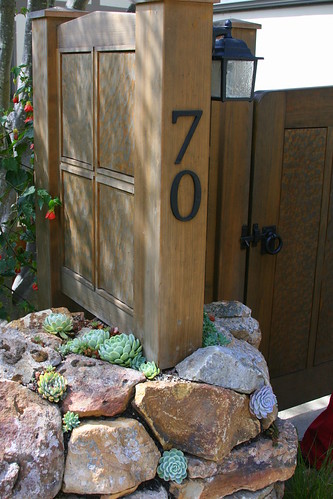
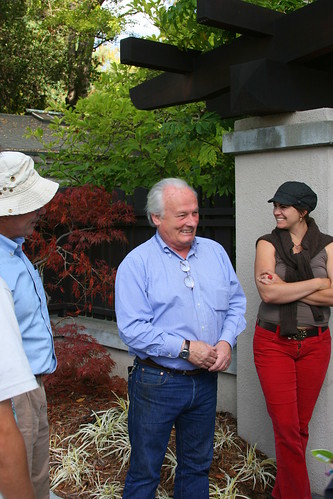
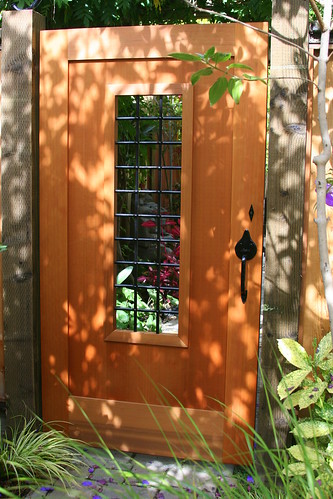
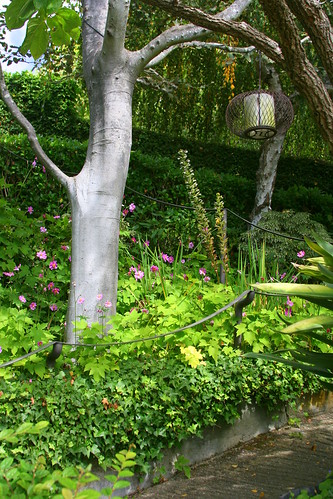
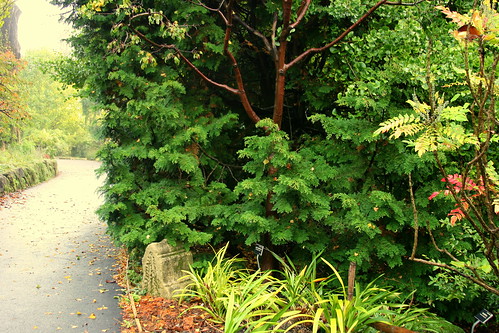
The first session was about focal points:
focal point

framing and focal point

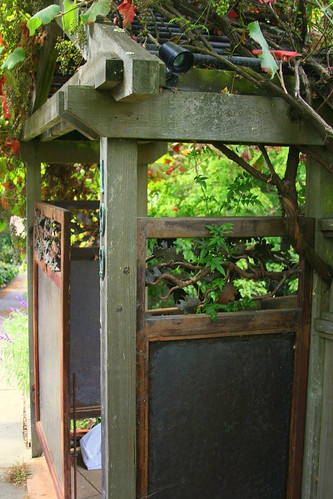
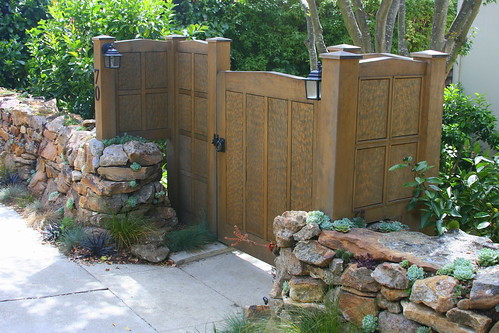
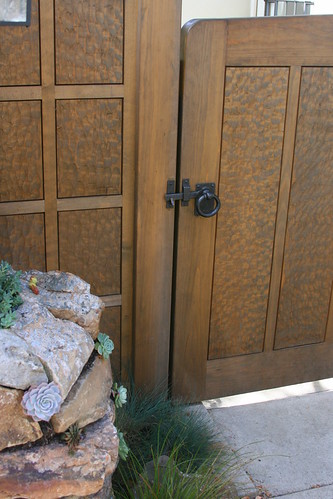
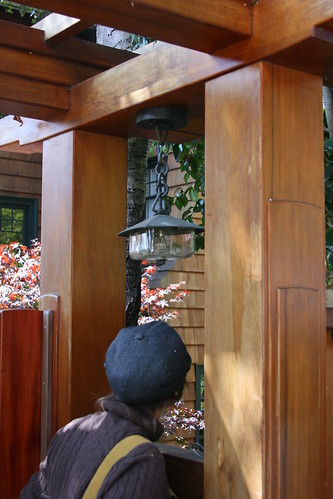
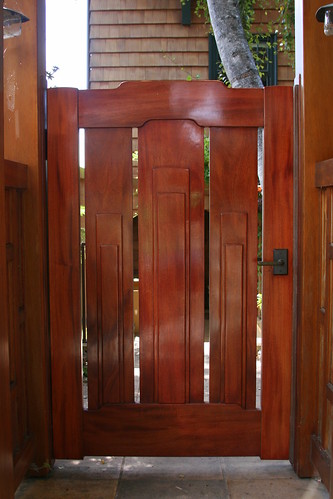
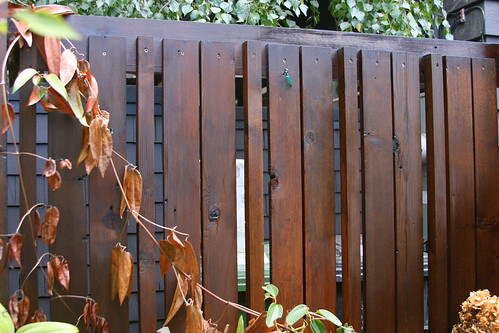
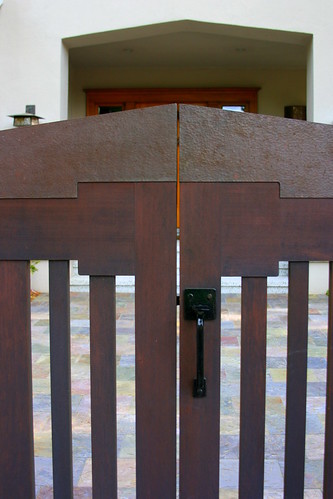
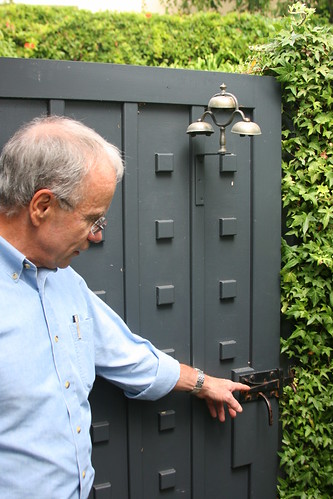
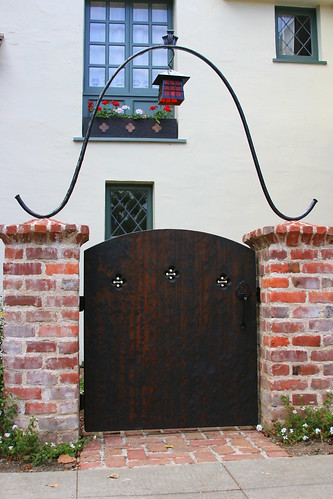
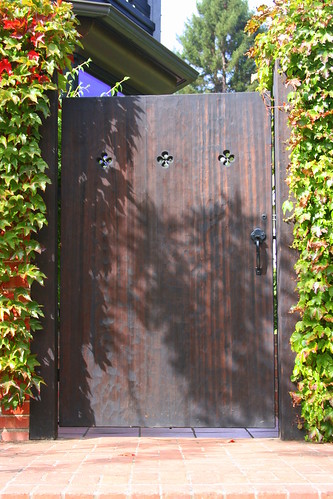
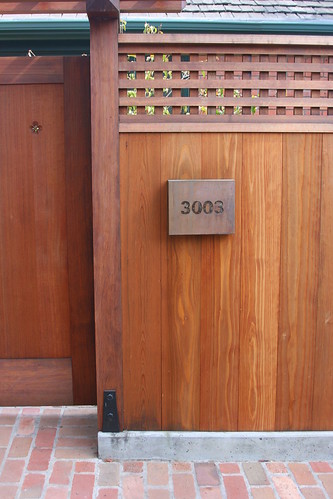
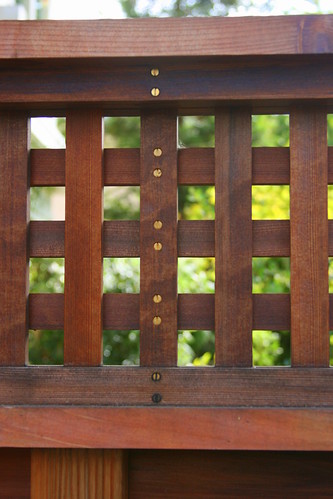
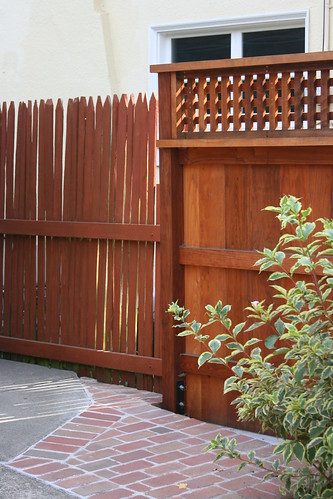
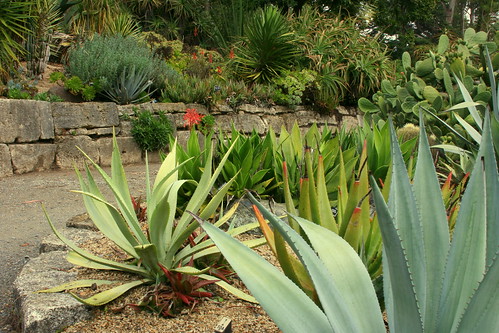
Here we worked on framing:
south africa bed with restio

south africa bed with aloes

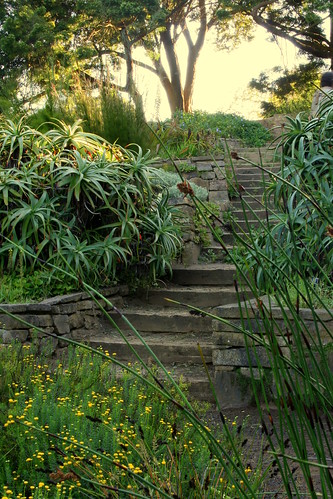
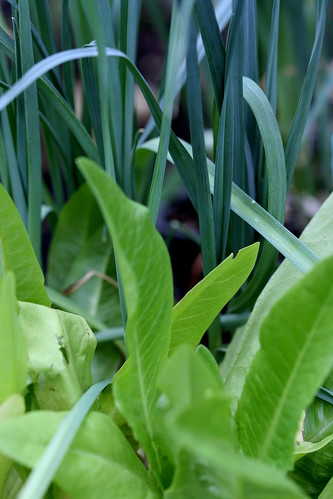
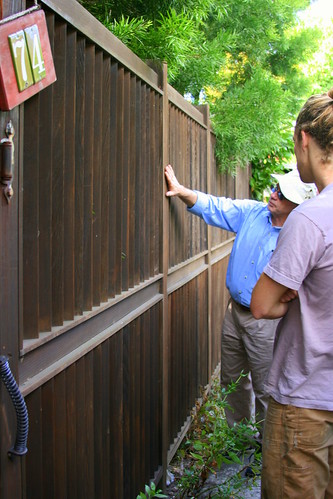
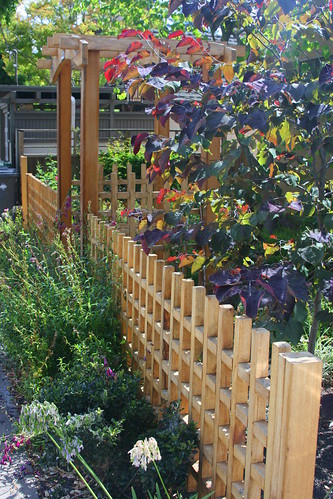
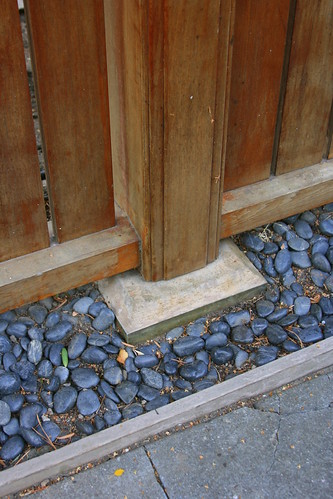
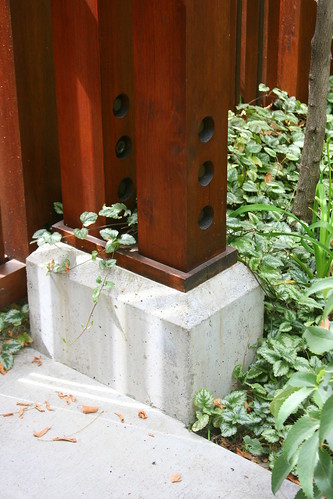
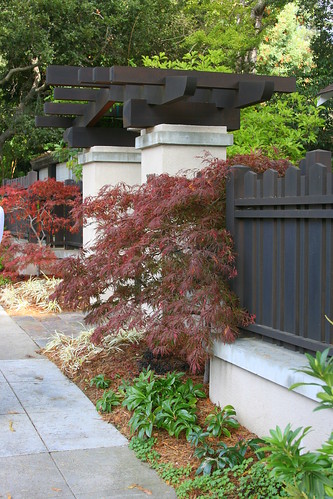
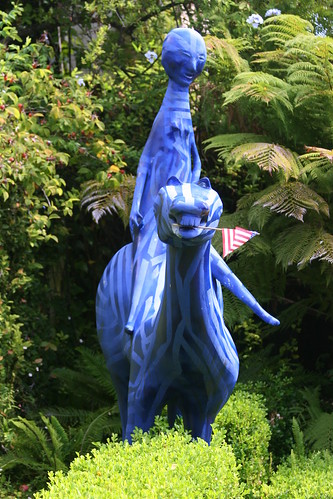
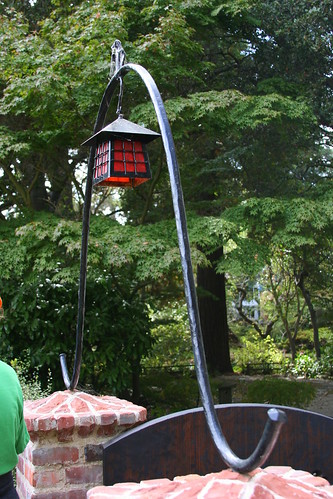
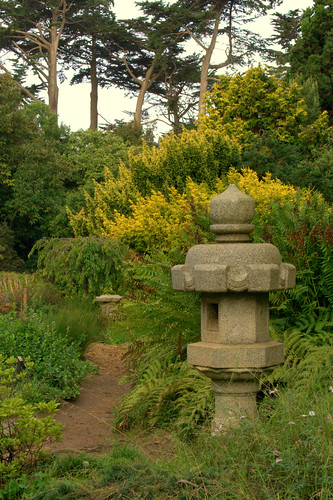
The 3rd session was about lines in the garden leading the eye:
leading lines

yucca anchor

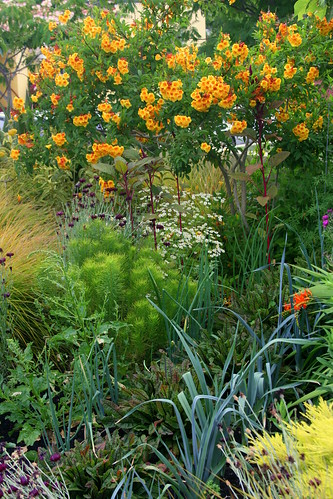
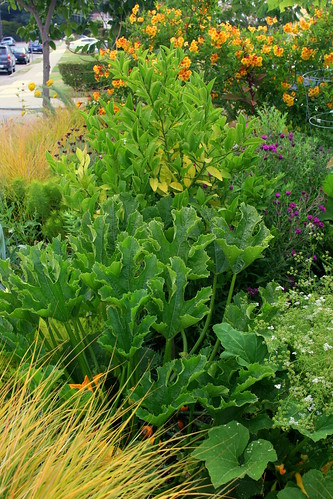
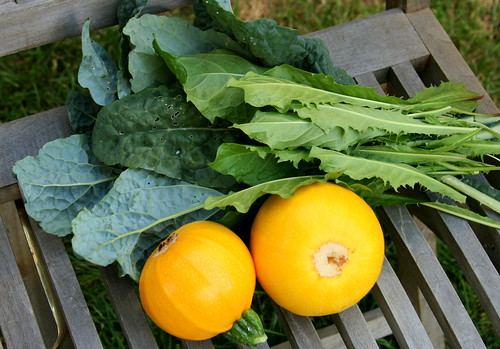
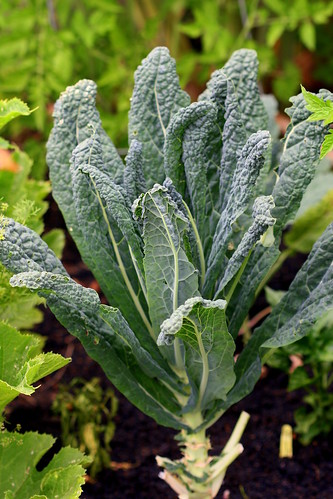
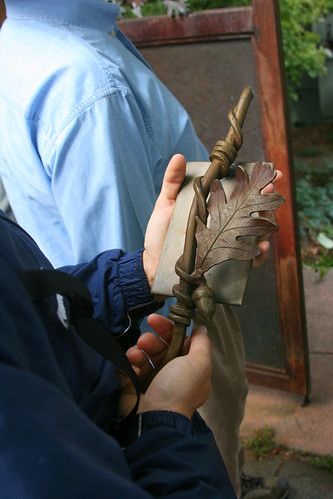
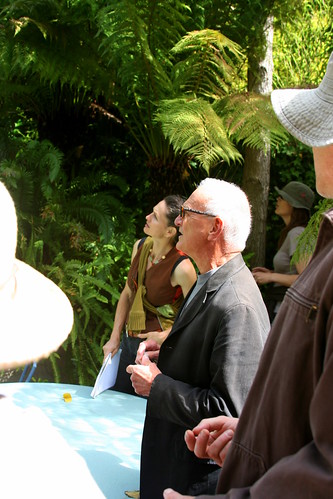
The last session we worked on photographing foliage as well as putting all of our other lessons to use:
foliage

creating an x

In this last photo, I really wanted to capture the light but the two trunks in the foreground, as Saxon put it "make a big x" on the photo that keep the viewer from really seeing what I was trying to capture. Sometimes all the finagling with different angles won't help and you just wish you'd packed your chainsaw. (Just kidding SFBot!)

Sunday, October 24, 2010

Edibles Roll Call Summer 2010

I'm cleaning up the skeletal remains of my veggie plants this weekend and I've realized that my best laid plans to document and weigh the total production of food from the garden this year didn't happen. Never bought that scale, darn it. At least I photographed most of the varieties this year. Last year we ate all the food before I realized it would have been nice to take some decent photographs of what I'd grown. I don't devote a special area or special resources to the edibles that I grow. They are mixed in with the garden plants throughout the front and back gardens. They have to deal with the same soil (humusy-clay), the same amount of fertilizing (a bit of compost at planting time) and the same amount of water (very little) as the established drought tolerant plants already there. I'm usually surprised by how well they deal with it and I'm usually overwhelmed by the amount a produce I reap from the meager resources I invest.

front yard veggie2front yard veggies3

Following is a photo essay of the edibles I grew this year with a few comments on their success (or in some cases lack thereof.)

The most successful group this year were tomatoes, even with the extremely foggy summer. I think this is due to the fact that I grew mostly Wild Boar Farm tomatoes this year. They rock.

BIG and meaty 'Pink Berkeley Tie Dye'. Highly recommended. I will definitely be growing this one again next year.
pink berk tie dye tomato

A few more winners from Wild Boar:

'AAA Sweet Solano'
tomato AAA sweet solano

'Big White Pink Stripe' neither white, nor pink but I'm not going to quibble about the name because it's big and yummy!
BWPS tomato

The blossom-end-rot-free 'Michael Pollan'
tomato michael pollan

not a Wild Boar tomato, but the really beautiful and delicious 'Green Moldovan'
green moldovan tomato

I grew several of the little fruited varieties too.

tomato plate

T. cheesemannii, 'White Currant', 'Sungold' - a classic I have to grow every year, 'Spike', 'Spain', and 'Black Cherry' - not recommended at least for cool summer areas as I found it rather bland. I also grew 'Yellow Pear' but it was not vigorous and I only got a few fruits.

tomato cheesemannii
tomato_white_currant
tomato sungold
tomato sungold back
spike tomato
tomato spain
tomato black cherry

The squash gods were good to me this year too.

Warty 'Yellow Crooknecks'
yellow crookneck squash

the bestest, tastiest Zucchini 'Costata Romanesco'
zucchini smile

more 'One Balls' than I could keep up with, many became 'One Bowling Ball'
greens and squash
And I love harvesting my dandelion weeds. So healthy for you! No more weeding those now, just harvesting.

The 'Dinosaur Kale' does double duty. It's a great blue-gray foliage plant and a healthy addition to your menu. I love being able to go out and grab a few leaves whenever I want.
dino kale

I would also grow leeks for their foliage, even without the benefit of being edible. I love the rows of strappy blue foliage that bisect my garden. 'Bandit' isn't the longest white-shanked leek out there but it's easy and tough. I plant my seedlings deep, but also in furrows so I can cover them even deeper with soil as they get bigger for a longer white section.
leek_bandit

That blue leek foliage makes a great foil for chartreuse Lettuce 'Amish Deer Tongue'.
lettuce and leeks

I have to admit that for the longest time I was too intimidated to grow lettuces. I know everyone says they are like weeds and super easy but they just look so tender and delicate, I thought they would just turn crispy in my dry garden. But I've been very happy with 'Amish Deer Tongue' and 'Mascara'. As with most lettuces, they were done by early summer, but up until then they put up with my sporatic watering very well. The 'Mascara' was especially delicious. We make a lot of pizzas at home and I loved dressing the leaves in oil and vinegar and piling them on top of my slices of thin crusted pizza. Yum!
lettuce mascara

I was curious about Cucumber 'Long White'. My plant produced many cucumbers which were white on the underside but mostly light green. But whatever, they were tasty. The skin did get bitter eventually and needed to be peeled but that was probably due the lack of watering.
cucumber white
Last year I was overwhelmed with lemon cucumbers but this year my plant was shrimpy and put out only a few measly fruits. Guess I just got a weakling.

I grew Melon 'Minnesotta Midget' and was quite pleased with the one melon I got. SUPER sweet. I'd grow it next year and be happy even if I only got one again.
melon minnesotta midget
minnesotta midget melon

I tried growing garbanzo beans this year and got hardly a bowl's worth of beans but enjoyed the experiment. I wasn't even sure I could grow them here, somehow suspecting they may need more heat. I may try them next year and see if I can do any better. The foliage is surprisingly cold to the touch. On closer inspection the pretty gray foliage is covered in little oil glands - built-in air conditioning I'm hypothesizing.
garbanzo flower

It was quite a fig fest this year. I canned 36 jars of fig jam. I guess everyone knows what they're going to be getting for Christmas this year!
figs
big fig
fig jam
I'm now begrudgingly sharing the last few figs with the birds and a pesky squirrel. I hope I don't regret letting that tree get on their radar.

And now I'm harvesting all my peppers and looking forward to making some roasted bell pepper pesto!
peppers

If you are curious about growing any of these edibles, many are available at Annie's Annuals and Perennials.

Thursday, October 7, 2010

Gates and Fences to Aspire To

I recently went on a walking tour of a neighborhood in Berkeley filled with nice gates and fences. We discussed wood quality, construction techniques and workmanship. Here are some of the cream of the crop.

The first gate was hand forged by the artist for her house, with oak leaf details and hammered copper sheets. She happened to be home when we were there and she showed us the soon to be added oak leaf handles.

wrought iron gate

wrought iron gate side panelwrought iron gate handle

The next fence was a bit groovy for my tastes but was of interesting construction. The louver direction changed mid-way down the fence for maximum privacy depending on the direction one was walking down the sidewalk. This might be a good fence for windy areas, where the breeze needs to be slowed down. Sometimes a solid fence that blocks wind completely will create a small calm air pocket but also more violent wind turbulence further into the garden as the air rises over the fence and then swirls back down into the garden. Slowing the wind down, but still allowing it to pass through, can create a calmer wind pattern throughout the garden.

louvered fencelouvered fence detail

This gate was beautifully combined with a rock wall, very unusual combination. We figured out it was constructed by sinking a pressure-treated post into the rock wall and then covering the top of the post with panels to match the gate. Nice trick.

rock wall gate

post and veneerrock wall gate door detail

Here's a nice modernization of the picket fence:

grid fencegrid fence detail

Lovely Japanese styled fence and gate. My favorite details on this fence are the column bases. The concrete footings are beveled, edged in brass and made of colored concrete. Nice detail!

japanese gate arbor detailjapanese gatejapanese fencejapanese post detail

Another carefully detailed fence and gate - beveled edges on the timbers, beautifully grained wood, countersunk bolts and concrete footings that become design elements.

copper gate

copper gate arborcopper gate post footing

But to the side of the gate, is a newer fence that appears to be by a different workman and of a much lesser quality. The boards are full of knots and not lined up evenly at the top and they used ugly screws that create a wobbly line too. Bleh.

copper gate bad side fence

This circle fence is pretty charming but I do wish that the gate and arbor had lined up to create a circle too instead of an oval. Also, one detail in the fence is going to lead to problems down the line. The boards are pinned by the 1x2 stringers in such a way as to create little "compost bins" where debris and water can collect. If those tiny little pockets aren't cleaned out regularly the bottom of the boards will begin to rot.

circle fence

circle fence gate

circle fence detail

Now onto the truly creme de la creme of gates, those created by Julian Hodges. We lucked out on our tour when Julian himself happened up while we were admiring one of his gates. He went along with us and talked about his construction methods. He's a very charming, funny man and it was so wonderful to listen to him discuss his work. The following gates and fences are all by Julian Hodges.

The wood for this fence and arbor are all of extremely dense, fine-grained old growth redwood, sourced by Julian. This is some of the last of its kind. You can't find wood like this anymore.

julian hodgesclairmont fence and arborclairmont gate arborclairmont gate

In leu of the high quality redwood that Julian usually works with but can no longer find, he is starting to use Red Cedar. It is a nice honey color as you can see from this gate.

cedar gate

We were checking out the curvy gate in front of this house when the owner invited us in and through his backyard to look at the back gate that matched the front door. A very nice owner and a beautiful garden with interesting sculpture.

front gate

back gateback gate handmade latchgarden sculptureinviting ownerhillside gardenvertical fence and gate

The next gate was constructed to match the tudor house with a rustic charred finish and wrought iron arch.

tudor gate and archtudor gate backtudor gatemore julian hodges gates

The last gate and fence we visited were beautifully simple. High quality wood and construction shine through. The only ornamentation are the classic Julian Hodges quatrefoils carved into the door.

hodges gate and arborhodges fence nice lineshodges fence step downhodges fence detail

The hardware on the fence is only visible from the backside. And you can easily see the contrast between the quality of construction between the front and side fences. I'm sure not many can afford a Julian Hodge's fence completely surrounding their property!

hodges fence backsidehodges fence and neighbors fence